How to Edit, Export & Upload High-Quality Videos to Instagram.
This is a tutorial on how to edit and export high-quality videos for Instagram Reels using Premiere Pro. You will learn the best Instagram Reels Premiere Pro settings.
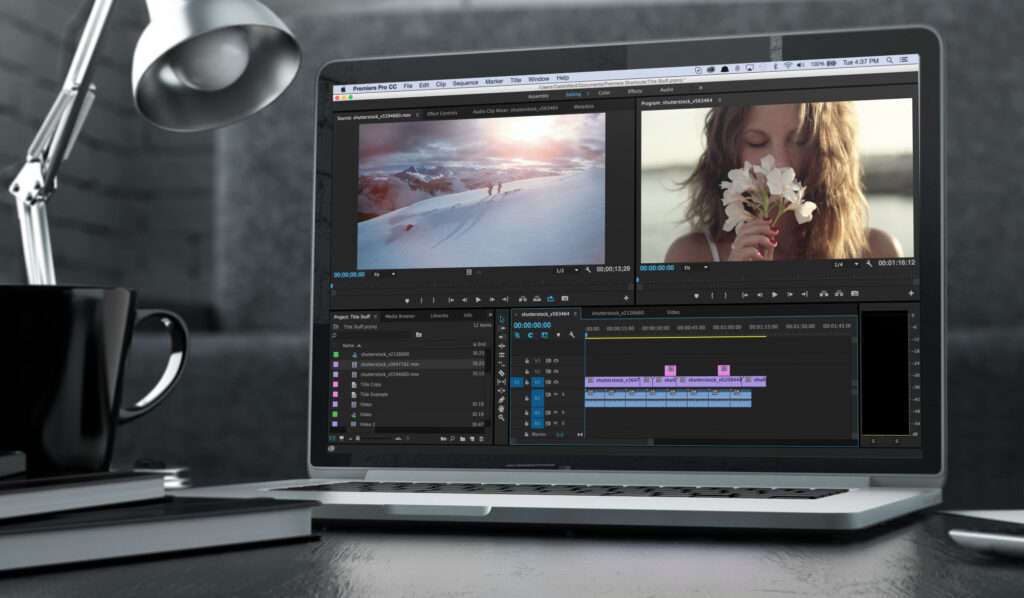
Today, you will learn how to edit and export in Adobe Premiere Pro and then upload to Instagram Reels. Let’s start off here in Premiere Pro. I’ve already created a project, and I’ve already imported some footage. If you shot your video in vertical already, that’s great. If it’s horizontal, we’re gonna make it work with Instagram Reels Premiere Pro settings.
Creating A Sequence With The Proper Resolution For Instagram Reels Premiere Pro Settings
So this clip that I imported is a 4K clip at 24 frames per second, but now we need to create a sequence that is right for Instagram Reels. So you can either hit command N to bring up the new sequence dialogue or come up here to file, new, sequence. And we can start with digital SLR, and come down here to 1080p, 30 frames per second, and click on settings.
And we’re just gonna make sure that the framerate, or the time base, in this case, is 29.97. But we need to change the frame size to 640 by 1136. All these other settings are okay. And we want to come down here to save preset so we don’t have to do this again. Instagram Reels vertical video. Say OK, and we could just call this sequence Reels. And say OK.
So the reason for these settings is Instagram applies video compression to every video that is uploaded. So no matter what I do to this, it’s still gonna check it to see that it is conforming with their standard. They do this for the user experience, so everything is uniform across the platform. Big files don’t take longer to load.
How I came up with those numbers was, I created a 4K video at 24 frames per second. Now, if I bring up the inspector, the resolution is 3840 by 2160. It is at 16 by nine, 24 frames per second. And then I uploaded this to Instagram Reels, and then what I did was I downloaded it, and this is what it came down as, a resolution of 640 by 1136, still a nine by 16 aspect ratio, 30 frames per second, and a data rate or a bitrate of 1.88 megabits per second.
So Instagram Reels will change it. It changed it from my 4K at 24 frames per second to a resolution of 640 by 1130, six 30 frames per second. So it’s best to downscale your video yourself. Don’t let Instagram do it for you. That way, Instagram doesn’t have to do that much to it. It’ll still check, but do it yourself. Since you have Instagram Reels Premiere Pro settings.
So now what I want to do is, I want to come up here to modify, interpret footage, and I’m gonna change the framerate to 29.97 per second so that it matches the frame rate of the sequence. And say OK. Now I’m gonna add this clip to my timeline. I get the clip mismatch warning. I’m gonna keep existing settings. Now we have our clip on our timeline. Let’s adjust it for our vertical video.
Editing Your Instagram Reels Premiere Pro Settings
So let’s come up here to effect controls, choose our clip. And so, depending on the size of our video when we bring it in, you can either have bars like this, and all you need to do is use the scale and bring it up until it fits your frame. You can use the position to move it any way you like.
So something to consider, if you have a close-up shot, you want to make sure that your subject is in the middle of your frame. Just to show you, the clip on the left is what you would see in the Instagram feel when you play a Reels, and the other clip on the right is what you would see if you were actually in Reels. You could see that in the one on the right, there’s more frame showing. Just something to consider. Instagram Reels Premiere Pro settings
Now that we’ve got our clip position where we want it, now we can cut it down to what is good for Instagram Reels. Now, it was 15 seconds. You can go up to 30 seconds for a Reel. So I’m just gonna slide this over 30 seconds, and we’ll cut the rest off. You can add additional edits.
Like, I might add an adjustment layer, and you can put effects on it, or give it a little color grade. I added a Lumetri color on this. And just give it and a little bit more exposure, bring up the shadows a little bit, maybe give it some more color, take down some of the highlights. So this is how our clip is looking now. Instagram Reels Premiere Pro settings.
Exporting Your Instagram Reels Premiere Pro Settings
I’m gonna mark my in point and my out point, and I’m ready to export now. Control or command M brings up the export dialogue, and now we’re gonna do the export settings. So the format is gonna be HDoC 264, match source, high bit rate. I’m gonna call this Reels, but I’m gonna save it in the right place. Coming down here to the video tab, make sure that it says 640 height, 1136. And because we said match source, that took care of that. And also, make sure that the frame rate is 29.97. If it’s not, you can uncheck any of these boxes and change them. Click render at maximum depth. I’m using hardware encoding for performance.
And now down to the bitrate settings, I’m going to use… BBR2, and set my target bitrate and my maximum bitrate to three megabits per second, and make sure use maximum render quality is checked also. And of course, we want to save this as a preset, too. I’ll hit the save preset and call this Instagram Reels Export Premiere Pro Settings and say OK and hit export. Instagram Reels Premiere Pro settings
Copying Your Video From Computer To Phone For Instagram Reels using Premiere Pro Settings
So now our video is exported out to the computer, so let’s get ready to upload it to our phones. So one thing you want to do now is have a lossless transfer of your video file to your phone. In other words, you don’t want to run your transfer through an app that introduces compression onto your video.
So there are many transfer methods, like, in my case I have a Mac, and I’m going to use AirDrop. Mac to Android might need to use Dropbox or a similar service. Windows computers can use a USB cable or a drive. Many ways to transfer. Just be careful not to use an app that introduces compression. Instagram Reels Premiere Pro settings
Here is my file. I’m gonna airdrop it to my phone. Now the video is on my phone. And so now we can go over to Instagram and upload it to Instagram Reels.
Upload Your Video To Instagram Reels
So now we’re in my Instagram profile, and up here at the top, there’s a plus. I’m gonna hit that, then I’ll come down here to create Reel, and on the lower left, if I click there, that will bring me into my film roll, and on the top left is my clip. There it is. This was Instagram Premiere Pro Settings.
Say add, and now, if I want to edit this, say I want to add temperature, and I want to add something else, day of the week, it’s Monday. I want to add some text. And what I was saying earlier is, when I’m adding these little things here, if I look at this Reel inside the feed, it could potentially cut off the lettering and things that I put too close to the top. I’ll show you here in a minute.
So you can get more creative. I’m just gonna share this, I’m gonna write a caption. Ride Down Las Vegas Strip. And you can put your hashtags, then you can save it as a draft, or you can share it.
I’m gonna share it here. And here it is playing in the feed. You can see that I didn’t put the wording too close to the top or to the bottom. If I click on this little symbol on the lower left, you can see it in Reels. You could see that it covers more area.